

Onigiri recipe: What Are Japanese Rice Balls?
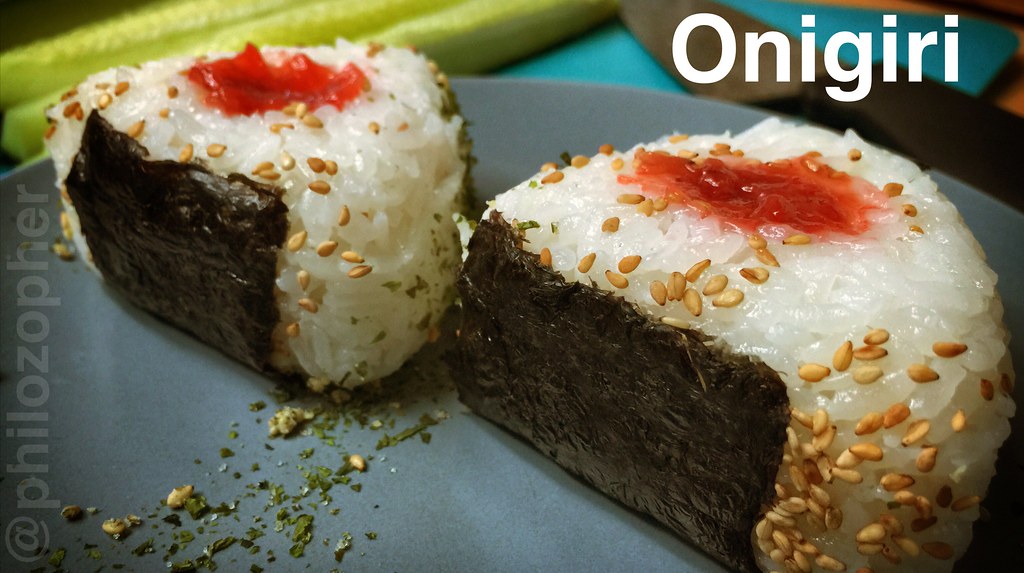
Onigiri recipe, also known as Japanese rice balls, are a quintessential part of the Japanese culinary landscape and are as symbolic of Japanese culture as sushi and tempura. At its core, onigiri is a simple yet versatile food item consisting primarily of white rice formed into triangular or oval shapes and often wrapped in nori (dried seaweed). However, the simplicity of onigiri belies the depth of its cultural significance and the variety it offers in terms of flavors and fillings.

The Basics of Onigiri recipe: An onigiri recipe is formed by taking freshly cooked, slightly cooled rice and molding it with hands wet with saltwater, which not only helps in shaping but also subtly seasons the rice. A key feature of onigiri is the potential for a multitude of fillings tucked into the center of the rice ball. These fillings can range from pickled plum (umeboshi), salted salmon, bonito flakes (katsuobushi) with a touch of soy sauce, to more modern adaptations such as curry or cheese. This variety makes onigiri a favorite for meals on the go, picnic lunches, or a quick snack.
Ingredients Onigiri Recipe |
Quantity |
|---|---|
| Japanese short-grain rice | 2 cups |
| Water | 2 1/2 cups |
| Rice vinegar | 1/3 cup |
| Sugar | 2 tablespoons |
| Salt | 1 teaspoon |
| Nori sheets (seaweed), cut into strips | As needed |
| Fillings of your choice (pickled plum, grilled salmon, tuna, pickled vegetables, etc.) | As desired |
Instructions Onigiri Recipe :
- Rinse the rice under cold water until the water runs clear. Combine the rice and water in a rice cooker and cook according to the manufacturer’s instructions.
- In a small saucepan, combine the rice vinegar, sugar, and salt. Heat over low heat until the sugar and salt dissolve. Once the rice is cooked, transfer it to a large bowl and gently fold in the vinegar mixture, making sure to coat the rice evenly. Allow the rice to cool to room temperature.
- Prepare your chosen fillings. If using fish, cook and flake it. For vegetables, chop or prepare them as needed.
- Wet your hands with water to prevent the rice from sticking. Take a small amount of rice (about 1/3 cup) and place it in the palm of your hand.
- Make an indentation in the rice and add a small amount of your chosen filling in the center.
- Enclose the filling with the rice, shaping it into a triangle, ball, or cylinder. Press the rice firmly to ensure the onigiri holds its shape.
- If desired, wrap a strip of nori around the onigiri. The nori strip can be used to hold the onigiri and provide a convenient way to eat it.
- Repeat the process with the remaining rice and fillings.
Your Onigiri is now ready to be enjoyed! They can be served as a snack, lunch, or part of a bento box. Feel free to get creative with different fillings and shapes to suit your preferences.
Tabla Nutricional Onigiri Recipe
| Nutrient | Amount per 150g Onigiri |
|---|---|
| Calories | ~200-250 kcal |
| Protein | ~4-6g |
| Carbohydrates | ~40-50g |
| Dietary Fiber | ~1-2g |
| Sugars | ~1-2g |
| Total Fat | ~1-2g |
| Saturated Fat | ~0.5g |
| Cholesterol | Varies based on filling |
| Sodium | Varies based on filling |
| Potassium | Varies based on filling |
| Calcium | Varies based on filling |
| Iron | Varies based on filling |
| Vitamin C | Varies based on filling |
Japanese Rice Magic: The Ultimate Onigiri Recipe
The Cultural Significance of Onigiri: Onigiri recipe carries with it a sense of nostalgia for many Japanese people, often being a staple in school lunchboxes, reminiscent of childhood and the care put into homemade meals. It is not uncommon to see onigiri in convenience stores across Japan, speaking to its enduring popularity and accessibility.
The ease of customization and the hands-on experience of making onigiri recipe have made it a beloved food item for generations. As a traditional food handed down through centuries, onigiri also finds its place in festivals and is a common offering at shrines in Japan.
In recent years, onigiri recipe has undergone a kind of global renaissance, being celebrated in Japanese restaurants worldwide and inspiring food lovers to create their own versions. The adaptability of onigiri means that it can easily accommodate regional flavors and dietary preferences, making it an increasingly popular choice for a healthy and convenient meal option. Through this international lens, onigiri is not just a rice ball—it’s a window into Japanese tradition and culinary creativity.
Choosing the Right Ingredients for Your Onigiri Recipe
When it comes to crafting the perfect onigiri, selecting high-quality ingredients is paramount. The soul of onigiri rests within its simplicity – a triangle of perfectly cooked rice hugged by a strip of nori. It’s the nuanced flavors and textures of the chosen fillings, however, that can transform this humble rice ball into a gourmet delight. To ensure each bite is a harmonious blend of taste and freshness, it’s essential to start with premium-grade, sushi-quality rice. The grains should be short to medium in length to achieve the requisite stickiness that holds the onigiri together without becoming overly mushy.
Onigiri Elegance: A Culinary Symphony in Rice
Once the foundation of rice is laid, the filling you select becomes the heart of your onigiri recipe. Traditionalists may prefer umeboshi, a pickled plum which imparts a tangy sharpness that cuts through the starchiness of the rice. Alternatively, for a savory punch, flakes of grilled salmon or tuna, seasoned with a hint of soy sauce or mirin, are popular choices that resonate with the palate. Those looking for a more indulgent flavor profile might opt for fillings such as tempura shrimp or yakiniku (grilled beef), which elevate the onigiri to a more luxurious snack. Vegetarian options abound as well, with perfectly cooked shiitake mushrooms or creamy avocado offering a satisfying depth of flavor.
Rounding out the composition of your onigiri recipe, the wrapping of the nori is the final touch that shouldn’t be overlooked. The nori should be crisp and toasty, enveloping the lower half of the onigiri for a contrasting texture to the tender rice. To maintain the integrity of the nori, it is optimal to wrap the onigiri just before consumption, ensuring the seaweed stays crunchy. For those seeking an extra dimension of taste, seasoning the nori with a sprinkle of sesame seeds or a light brush of tamari can provide an elevated umami experience.
Consideration of how each ingredient will interact is the key to creating the ideal onigiri. Balancing flavors, whether contrasting or complementary, will contribute to a rice ball that is as delightful to eat as it is aesthetic. The harmonious marriage of premium rice, thoughtful fillings, and quality nori creates an onigiri that stands out, making every effort put into selecting the right ingredients worthwhile.
Step-by-Step Guide to Making Perfect Onigiri recipe at Home

Gathering Your Ingredients
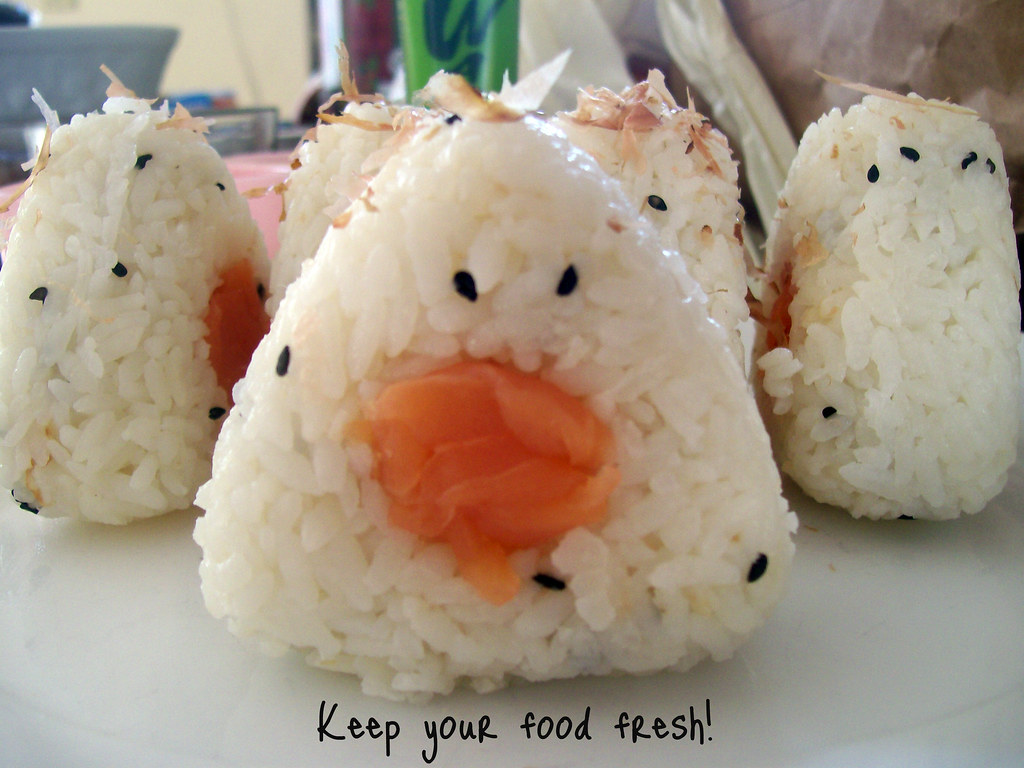
Before we dive into the hands-on process of making onigiri, it’s crucial to ensure that you have all the necessary ingredients at hand. The key component of onigiri is Japanese short-grain rice, known for its sticky texture that is perfect for molding. You’ll also need your filling of choice, which traditionally includes ingredients like salted salmon, pickled plum (ume), or a tuna mayonnaise mix. Additionally, designate a small bowl with water and salt to help shape the onigiri without the rice sticking to your hands.
Preparing the Rice
The foundation of any onigiri recipe is well-cooked rice. Start by rinsing your rice in cold water until the water runs clear. This step removes excess starch, which is essential for achieving the ideal onigiri texture. Cook the rice according to your rice cooker’s instructions, or opt for the stovetop method for equally delicious results. Once cooked, let the rice cool slightly until it’s comfortable to handle but still warm enough to mold effortlessly. This warmth is crucial as it helps the grains to stick together more effectively.
Molding Your Onigiri
With the rice prepared, now comes the fun part – shaping your onigiri. Wet your hands with the prepared saltwater to prevent sticking, then scoop a desired amount of rice into one palm. Gently press the rice to compact it slightly, then create a small indent in the center for your filling. Place a spoonful of your chosen filling onto the rice, adding more rice on top to cover it completely. Now comes the shaping: for a triangle onigiri, cup both hands around the rice and turn it as you lightly press to form sharp edges. For a ball shape, simply roll the rice between your palms gently. Remember, the key to perfect onigiri is gentle pressure; too much, and the rice will become dense and hard, too little, and it won’t hold its shape.
Wrapping with Nori
No onigiri is complete without a wrap of nori (seaweed). For that authentic touch, cut a strip of nori and wrap it around the base of your onigiri. This not only adds flavor and texture but also serves as a convenient handle for eating without mess. The nori should be added just before serving to maintain its crispness against the moist rice. Whether enjoying your onigiri immediately or packing it for a later meal, the nori plays an essential role in the overall experience.

Delicious and Creative Onigiri Fillings and Variations
Onigiri, also known as Japanese rice balls, is a beloved snack that combines the simplicity of rice with the excitement of various fillings. The versatility of onigiri allows for a multitude of creative combinations that can cater to any palate. Whether you’re a fan of classic flavors or enjoy experimenting with new ingredients, the possibilities for onigiri fillings and variations are endless.
For a taste of traditional Japanese cuisine, consider starting with umeboshi (pickled plum) or shiozake (salted salmon) fillings. Umeboshi lends a tangy and slightly sour flavor that contrasts beautifully with the subtle sweetness of the rice. Shiozake, on the other hand, delivers a punch of umami and saltiness, making it a favorite among onigiri enthusiasts. Both fillings retain moisture well and can keep your onigiri delicious even after a few hours, perfect for picnics or packed lunches.
Rice Delight: Unveiling the Art of Onigiri recipe
If you’re seeking something more adventurous and modern, onigiri is your canvas for creativity. Fillings like spicy tuna, teriyaki chicken, or even unconventional ingredients like cream cheese and jalapeño are gaining popularity. For vegetarians or for those looking for a lighter option, try fillings such as avocado, edamame, or a mix of sautéed vegetables seasoned with soy sauce and sesame oil. The richness and creaminess of avocado, burst of green freshness from edamame, or the caramelized sweetness of vegetables can elevate your onigiri to new culinary heights.

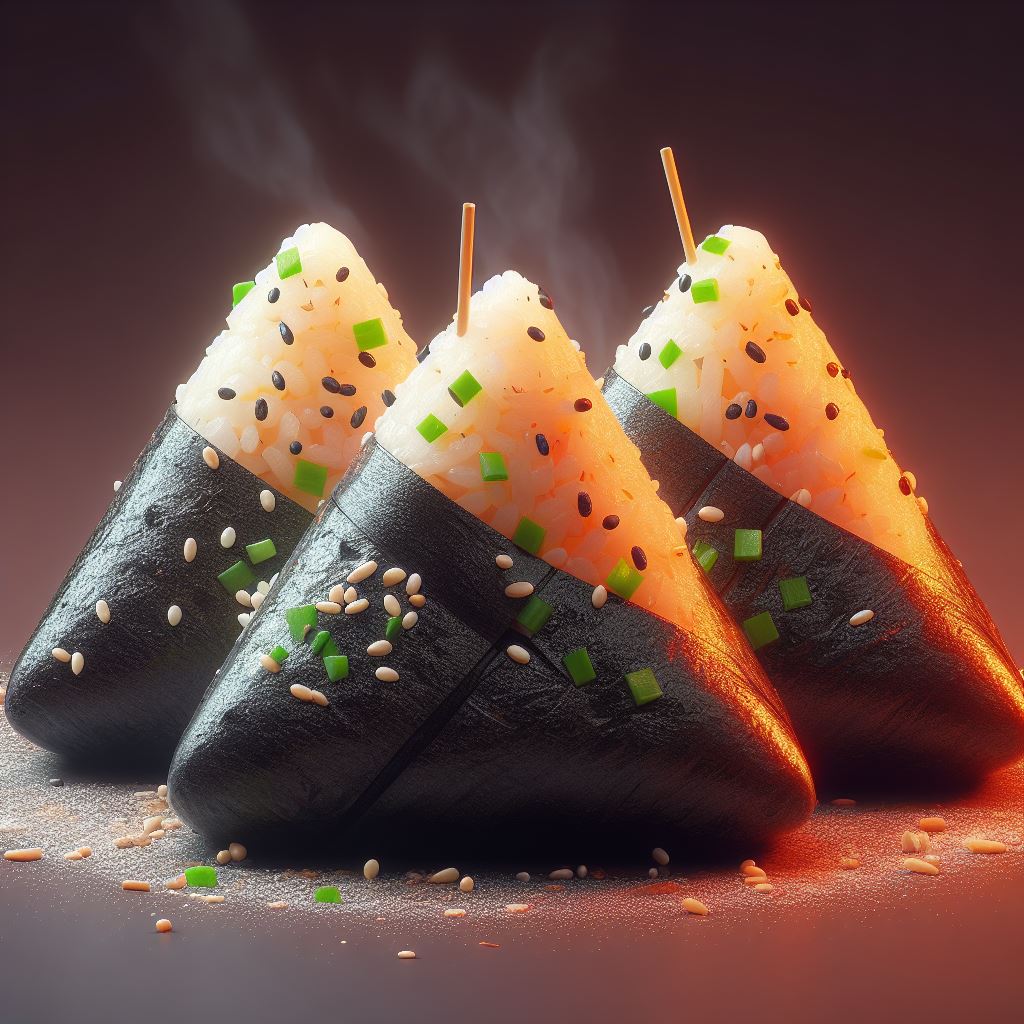
Beyond the filling, the variation of onigiri is also in its form and additional flavors. Yaki onigiri, or grilled rice balls, add a smoky taste and a crunchy texture to the outside of the onigiri, while furikake— a seasoning mix of dried fish, sesame seeds, chopped seaweed, sugar, and salt— can be mixed into the rice or sprinkled on top for an extra burst of flavor. The key to a delectable onigiri is balancing the flavors and textures to complement the rice and filling. Whether it’s the classic triangular shape or molded into cute designs, each onigiri can be a delightful eating experience.
Serving and Storing Tips for Your Homemade Onigiri recipe
Onigiri recipe, those delightful Japanese rice balls, make for a convenient and versatile treat. Perfect for picnics, lunches, or a quick snack, proper serving and storing is key to maintaining their freshness and flavor. When serving onigiri, it is important to consider the timing. These rice balls are best enjoyed soon after they are made, allowing for the texture of the nori (seaweed) to remain crisp and the rice to retain its subtle warmth. To serve them as they do in Japan, consider wrapping them in a separate piece of nori, which can be held as you eat, preventing sticky fingers and preserving the nori’s crunch until the very last minute.
Storing homemade onigiri, however, requires a bit of know-how to keep them delicious for later consumption. If you’re not planning to eat your rice balls right away, wrap each onigiri tightly in plastic wrap as soon as they cool down and place them in the refrigerator. This will help to maintain the proper moisture levels within the rice. An alternative method to ensure freshness is to use onigiri cases, which are designed specifically to keep your rice balls moist, yet not too sticky, for several hours. These containers are beneficial if you’re planning to take your onigiri on-the-go.

Onigiri Mastery: Crafting the Perfect Rice Ball
For those who plan to enjoy their onigiri throughout the week, freezing them is a fantastic option. Onigiri freezes exceptionally well, and this can be done by first wrapping them individually in plastic wrap and then placing them inside a freezer bag.
When you’re ready to eat one, simply reheat it in the microwave — with the wrap still on to retain moisture — for about one to two minutes. They can go directly from freezer to microwave, making them a convenient option for a fast and satisfying meal or snack.
Lastly, it’s essential to consider the fillings when storing onigiri recipe. Fillings like pickled plum (ume) or salted salmon are more durable, but if you’re using fillings that can spoil quickly. Such as mayonnaise-based salads or raw fish, you should consume them within a few hours to avoid any risk of food spoilage.
Always keep food safety in mind and when in doubt, opt to enjoy these tasty treats fresh and at their best quality.

